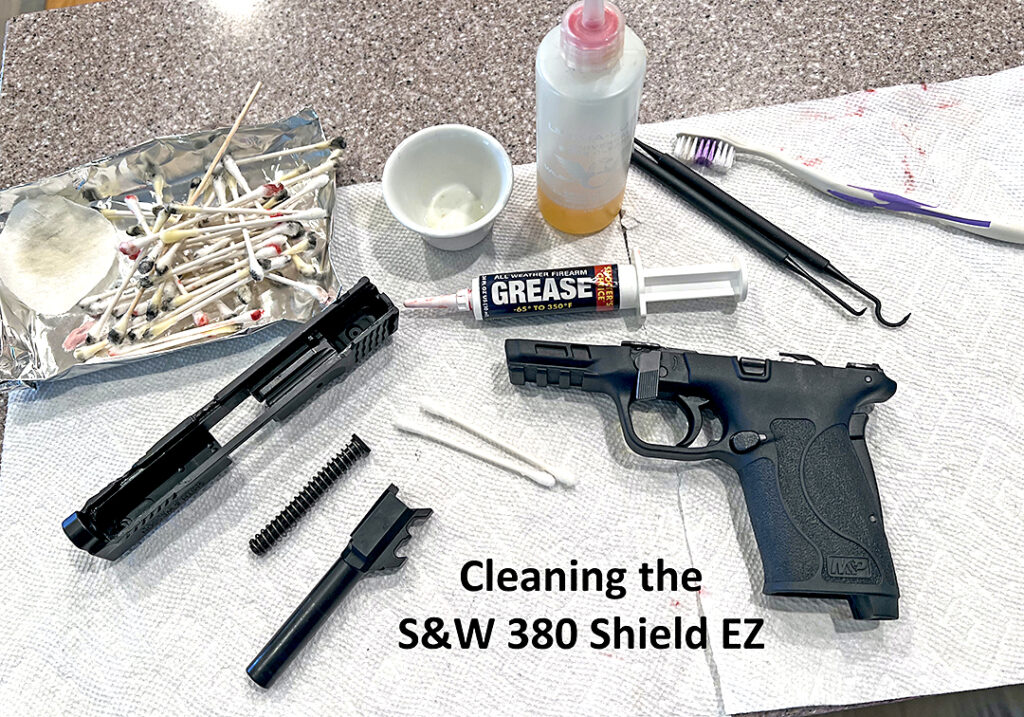
Cleaning the Smith & Wesson 380 Shield EZ

“Hey Marj,” begins Joe. “Isn’t it about time to write about cleaning guns?”
“Sure,” I reply, trying to sound enthusiastic. “Which one would be the best?”
“A lot of friends have .380s. I’d say that of the .380s, the S&W .380 Shield EZ would be the one most often purchased. Have your friends cleaned their guns?”
“Well, probably. I expect so. Maybe. Let me think… No one has actually told me they have.”
“Then, isn’t it a good idea?”
It is a good idea. Do you have a Shield .380? When did you clean it last? Have you ever cleaned it?
So let’s talk about cleaning the .380. But, give me a moment or two. I have to put the dishes away.
Now that they’re away, I guess it’s time. Oh, wait a sec. I have to vacuum the kitchen floor. It feels great when you walk barefoot over a swept floor. Although… It feels even better when the floor has been freshly mopped.
“Marj, are you done with your article?” Joe calls from the other room.
Drat. Caught. Sigh.
OK, here we go. First, find a surface that cannot possibly be harmed by solvents. I learned this the hard way after covering the dining table with a heavy plastic shower curtain and mounds of newspaper. Now, the dining room table still needs to be refinished.
We use Corian counter tops. Joe suggests glass works too. An outdoor wood patio table is usually safe. You can also find rubbery mats made for this use. But don’t depend on them to keep a surface pristine. Then, on any surface I find indestructible, I cover it with paper towels so cleaning residue can be tossed.
Next, gather all the cleaning supplies you’ll need. I’d begin with a tray made of aluminum foil to hold dirty cleaning stuff. A very small glass container for solvent/oil. Use any new synthetic cleaner: Hoppee’s is Joe’s old favorite, but it’s mighty caustic and causes my eyes to water, nose to run and it stinks up the house. Fortunately, he converted to synthetic too.
You’ll want a “bore snake” the size of your barrel. The 380 and the 9mm snakes are the right size for your EZ. Get cotton swabs (Q-tips), and don’t get the cheap, shredding-fibers kind. You can find dentil picks made of plastic that won’t scratch your gun. You can purchase small pieces of cotton material especially made for cleaning, but an old stained cotton T-shirt cut up is just as good. Find a dedicated toothbrush. Don’t use your own. They are 10 for $1 at the flea market in Tallahassee.
We grease the rails of our guns, so have some on hand. I like the kind that is set up like a syringe because it gets in those tiny crevasses well. If you use your gun every week (regularly), you may only want to use your solvent/oil in these rails.
Keep a piece of sturdy paper and a pen nearby for any notes you may want to make on taking the gun apart or documenting wear spots.
Find a bright headlamp, so you can see clearly. Guns are almost all dark and black inside. Headlamps are super bright these days. You’ll look like a geek (or geekette), but wear it anyway.
We’re almost ready. Pour about one-quarter inch of solvent into your container.
Point your gun in a safe direction. Drop the magazine and set it aside. Pull back the slide to inspect the chamber to make sure there is no round left in the gun. Yes, I know you put it away empty, but check it one more time.
Pull the slide back and push up the slide lock button. Is the slide locked back? The other lever at the top of the frame is the take-down lever. See the serrations? Push at the serrations, and the lever will move. Push until it is at a 90’ angle to the frame.
If you’re right-handed, hold the slide with your left. Push the slide lock lever down and allow the slide to move forward off the frame cautiously. Now you have 2 parts!
Put the frame aside for now.
Captivate the spring with your left hand. Push against the spring and lift it upwards. Take it out. Holding the barrel by the barrel block (that part that is sticking up), lift it out. The slide is now in 3 parts: slide, barrel and spring.
Dip a piece of cotton into the solvent and wipe off the spring.
Pick up the barrel. Notice the ramp where the round is loaded into the barrel. It’s probably black and it ought to be shiny metal. With cotton swab and solvent, clean off the ramp.
Shiny? Good. Wipe the outside of the barrel and barrel block with solvent soaked cotton. I see a bit of shine indicating wear on the barrel block. I squeeze out a smidgen of grease on my finger and swipe this area.
Turn the slide upside down. Using a wetted cotton swab, clean out the rails and all the grooves until no black gunk comes off. Swabs are cheap, so keep changing them out until all the residue is gone.
Pay attention to the firing pin hole. Here’s a place where you’ll be glad you didn’t buy cheap cotton swabs because you don’t want any fibers left in here. This is a very dirty place. Clean it well.
Are we done yet? No. Run a bead of grease on the rails: where the frame and slide move against each other. Then take a swab and smooth it out. Take another swab and remove any excess grease. You want it to be just shiny: not gooey. Too much attracts gun shooting residue.
Put the slide assembly aside and pick up the frame. Clean the outside of the rails. Clean inside all the grooves, crannies and flat places. This will take a while.
Now, take a tiny bead of grease and go over the rails, wiping off excess with a clean swab as before.
Time to use the snake on the barrel. There’s a rough spot where the string meets the cloth of the snake. Saturate it with solvent. Slide the string down the barrel from barrel block side. Pull the snake all the way through the barrel. Tight? Yes. Keep pulling.
Look down the barrel. Any tiny spots? If so, pull the snake through again. Clean and shiny now? Good!
Reassembly is reverse of dismantling. To verify function, jack the slide and pull the trigger while pointing in a safe direction.
Click! You did it correctly!
Marj Law is the former director of Keep Wakulla County Beautiful who has become an avid shooter in retirement.